Monday, October 11, 2010

Ham and Cheese Sliders

Ahh...October! My favorite month of the year! I love how fall comes in during this month. Some days are chilly....others are quite warm like it is today! Fall also means Football season which I LOVE! I am a huge Colts fan...and for my husband...also a U of M fan. I so look forward to Saturday and Sunday afternoon, where all I have to do is cheer my team on...and eat!

These sliders are perfect for this time of year! They are quick to put together and very tasty. As I was making these this past weekend I was smiling to myself thinking about our little baby growing away in my belly. The recipe calls for you to sprinkle poppy seeds on the tops of the sliders and I was amazed to realize that at one point our baby was only the size of a poppy seed. Now she is just about 3 pounds and full of kicks and jabs all day long! I am more amazed that we will meet her in just 2 short months! Wow!

Anyways...back to the sliders! I hope you enjoy them!
Ham and Cheese Sliders
adapted from Annie's Eats

Ingredients
For sliders:
1 pack of Hawaiian Snack Rolls (there are 4 to a pack)
4 slices of ham
4 slices of provolone cheese
Mayo

For sauce:
3 Tbs melted butter
1/2 Tbs yellow mustard
1/2 tsp dried onion
1/4 tsp Worcestershire sauce
Poppy seeds for sprinkling

Directions
1. Preheat oven to 350 degrees
2. To assemble sliders, put mayo on each side of slider roll. Place 1 piece of ham and 1 piece of cheese on one side and put the slider together. Place on a baking sheet lined with aluminum foil.
3. To make the sauce combine all ingredients except the poppy seeds into a small bowl and whisk to combine. Drizzle over the sliders. Sprinkle with poppy seeds.
4. Cover with foil and bake for 10 minutes. Remove the foil and bake an additional 2 minutes, or until the cheese has melted. Serve warm.

Last Bite: Super easy and super fast. Feel free to experiment with these as well...I am sure there are some great flavor combos out there! Enjoy!


Monday, September 20, 2010

One Year Anniversary


Disclaimer: There is no recipe and no food photos in this post....just the wandering thoughts of a happy, pregnant lady!

I can't believe that Pat and I have been married for a whole year already! The time really seemed to fly by! We celebrated our one year anniversary over the weekend by going to Captains Cabin for dinner on Saturday night. I got the lobster tail, which I NEVER get but I figured, hey, since I can't celebrate with any wine, I might as well have an awesome meal! And trust me, it was! Pat dined on the prime rib and we both left in a food coma. On Sunday, our actual anniversary, we headed to Fort Wayne to register for Little Baby Knox.

Let me just tell you, Babies R Us does an incredible job of making an overwhelming task seem very manageable. They are very good at what they do and we were really happy that we chose to register there. But 2 hours later we were tired and hungry so we headed to Granite City for brunch. And again, stuffed ourselves silly. Their caramel cinnamon rolls....amazing!

On our way home from Fort Wayne I was thinking in the car about just how much can happen in a year. Here we are, one year later and expecting a wonderful baby girl in three months! Wow. I was also thinking that if someone would have told Pat and I on our wedding day that we would have a different dog a year later, neither of us would have believed it. And yet, our sweet Hershey is no longer with us, but we have a lovable and very funny Roxy now, who we love dearly.

I just feel very blessed that Pat and I found each other. He makes me laugh every day and has taught me so much in the time we have known one another. Sure, we have our differences like any couple, but he truly is the right person for me and I am happy to be his wife.

Late last week Pat sent me an email telling me to listen to a song he had found that would be his new theme song. It was Rodney Atkins 'Cleaning This Gun'. If you haven't heard it, hit it up on YouTube. It's about a dad meeting his daughters date for the night, while cleaning his gun. Pretty cute song. And it just makes me smile because I know he will be the best dad in the world! I wasn't sure how he would do at first after learning we were having a girl, but he has fully embraced the role of her protector, and she isn't even here yet. I so look forward to our future together and as a family.

I look back at pictures taken on our wedding day and smile every time. I think to myself how lucky I am that I was so happy on my wedding day...and still so happy today! Sure, I may be laughing like an idiot in every single picture, but that is what makes me love them even more. I wasn't concerned with looking perfect in every shot because I knew deep down we were getting the perfect shot. Our photographer captured our joy on our wedding day and I feel it every time I look at our pictures.

I have a great husband and feel so happy to have celebrated an entire year together as husband and wife. I look forward to many, many more years together. I love him very much!

Thursday, August 26, 2010

Updates!

Let me just tell you....pregnancy + MBA homework + working + puppy = one tired girl! But things really are going well here! Getting ready to start my 24th week and take a quick trip out of town with Pat. We have been told by just about anyone who has ever had a kid to take a trip now while we can...because once our little girl arrives this December....life will never be the same. So, Chicago....here we come!

I am sorry I don't have a recent belly pic to share either (they are on Pat's camera which I don't have with me at the moment) but rest assured...it's getting bigger! We did put the crib together this past week and here is a picture! It's crazy how our home is already getting ready for the baby. She is now kicking and punching up a storm too which I love! What an amazing feeling!


Things with our little puppy Roxy are going great too...although she is more like a toddler now than anything. She has endless energy and must sniff and put everything into her mouth! But she is such a joy and makes us laugh each and every day.

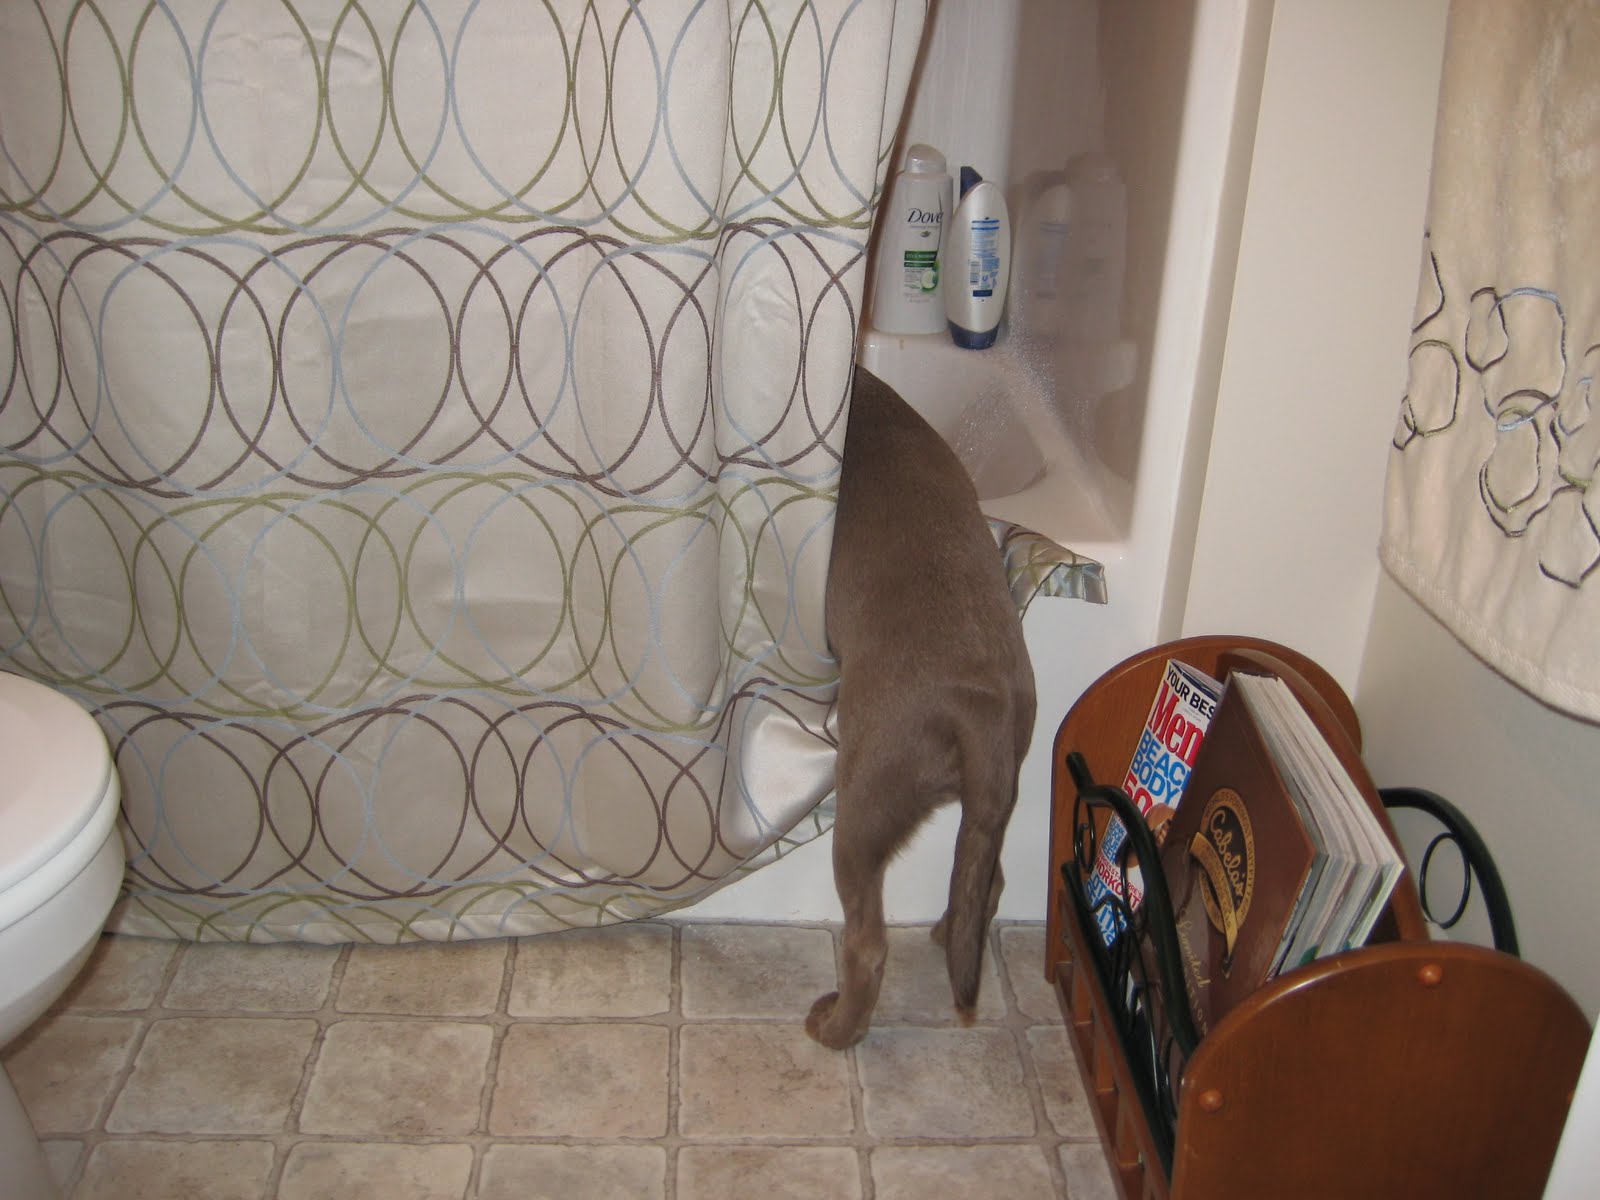
Here is one of her latest antics....she likes to climb into the shower! I snapped this picture real quick before she hopped in with Pat. Yes, she is a true water dog!

And she also insists on sitting on our lap during car rides. Here she is snoozing away. I hate to break it to her....but her time on our lap is getting short as she keeps growing.


And finally....a supper yummy summer meal to share! This came together in a snap and if you like salmon and like strawberries...I promise you will love it! I just tossed some potatoes in the oven too and made baked potatoes to go along with this meal...how easy is that???


Salmon with Strawberry Salsa
Adapted from Annie's Eats

Ingredients
Salsa:
2 cups fresh strawberries, rinsed, hulled and diced
1 cup fresh tomatoes from the garden (or store), chopped
2 scallions, white and green portions, sliced thin
1 tsp fresh flat leaf parsley, minced
1 tbs balsamic vinegar
1 tsp fresh lemon juice
Drizzle of olive oil
Drizzle of honey
Salt and pepper to taste
4 salmon fillets
Freshly squeezed lemon juice
Salt and Pepper to taste

Directions

1. To make the salsa, combine the strawberries, tomatoes, scallions, parsley, vinegar, lemon juice, olive oil, honey and salt and pepper to taste in a medium bowl. Mix well to blend, then cover and refrigerate while you prepare the salmon.
2. Preheat the broiler.
3. Line a baking sheet with foil and place the salmon fillets on the foil.
4. Squeeze a bit of fresh lemon juice over each fillet and season with salt and pepper.
5. Broil about 6-8 inches away from the heat source and cook fro about 10-12 minutes or until done.
6. Transfer salmon to serving plates and top with strawberry salsa. Serve warm.

Last Bite: Even though there is a ton going on right now (probably in your life too) I promise this really doesn't take long to whip up, and it's perfect on a warm summer night! Enjoy!


Thursday, July 29, 2010

Major Yum!


So this past weekend I made Muffins That Taste Like Donuts! They. Were. Awesome! :) Plus I have been craving a donut for about two solid weeks so I thought this was the slightly (but not by much I'm sure) healthier version. At any rate, Baby Girl Knox and I both loved them so much we ate roughly 4500. Ok, slight exaggeration, but still...Pat really only got about 2. You snooze, you lose man!

At any rate, they were super easy to throw together and make for a great breakfast. Or snack. Or dinner. You get my point!

Muffins that Taste Like Donuts
from Tasty Kitchen

Ingredients

1 3/4 cup flour
1 1/2 tsp baking powder
1/2 tsp salt
1/2 tsp freshly grated nutmeg
1/2 tsp cinnamon
1/3 cup oil
3/4 cups white sugar
1 whole egg
3/4 cups milk

For Topping
1/4 cups butter
1/3 cups white sugar
1 Tbs cinnamon

Directions

1. Preheat oven to 350 degrees
2. Combine flour, baking powder, salt, nutmeg and cinnamon in a medium bowl
3. Combine oil, sugar, egg and milk in a large bowl. Add dry ingredients and stir only to combine.
4. Spray muffin tin with vegetable spray and fill 1/2 way full with batter. Bake for 15 to 20 minutes.
5. Meanwhile, melt butter in a bowl. Combine the sugar and cinnamon in another bowl.
6. Once muffins are baked, shake onto counter while still hot. Dip muffins in butter, then into sugar/cinnamon mix. Let cool

Last Bite: Seriously, these were really good. You could taste the nutmeg in the muffin and then the sweet crunchy topping of sugar and butter...mmmm....so good! And hey, if you don't like them (because something is wrong with you, not the muffins) then bring them to me...the baby and I could use a few hundred more!

Wednesday, July 21, 2010

Super Summer Meal

Looks like I have been on quite a Giada kick lately...and it doesn't look like it's gong to stop anytime soon! Today's recipe is also from her collection. I just always love everything she comes up with. So last night for dinner Pat and I had her Spicy Chicken Tenders with Honey-Mustard Sauce, sweet corn on the cob and a lovely summer salad. It was a cinch to throw together and the perfect summer meal.

I was a bit worried that the spicy tenders would be too spicy so I cut back pretty drastically on the cayenne and hot sauce. Do NOT make the same mistake. While they were still really good...they had no spice at all. I will follow the recipe exactly the next time I make these.

Also...I am including a picture of the cute baby girl! We had our 18 week ultrasound yesterday and she looks great! She is measuring right on track and weighing in at a whopping 9 ounces. We got a 3D ultrasound and it is amazing how well you can see your baby! I just love looking at that little face and can't wait to meet her and love on her in December!


Ok...recipe time!

Spicy Chicken Tenders with Honey-Mustard Sauce
Giada De Laurentiis

Ingredients
Vegetable cooking spray

Honey-Mustard-
1/3 cup honey
1/3 cup whole grain mustard

Breading-
1 cup all-purpose flour
1 Tbs salt, plus extra for seasoning
3 large eggs at room temp
3 Tbs hot sauce
1 cup cornmeal
2 Tbs chili powder
1 tsp cayenne pepper
1 1/2 pounds chicken tenders
Olive oil for drizzling

Directions

1. Preheat oven to 425 degrees. Spray a heavy baking sheet liberally with cooking spray. Set aside
2. Honey-Mustard: In a small serving bowl, mix together honey and mustard until smooth. Set aside
3. Breading: IN a medium bowl, mix together flower and salt. In a second medium bowl, whisk together the eggs and hot sauce. In a third medium bowl, mix together cornmeal, chili powder and cayenne pepper.
4. Dredge the chicken in the flour and then into the egg mixture. Allow any excess egg mixture to drip off and coat the chicken in the cornmeal mixture.
5. Arrange the breaded chicken in a single layer on the baking sheet. Drizzle with olive oil and season with salt and pepper. Bake until golden and cooked through, about 15 to 17 minutes.

Last Bite: I will ALWAYS make my own honey-mustard sauce from now on. It was so easy and tasted WONDERFUL!!! Also...I will kick up the spice next time...but still a great meal!

Thursday, July 8, 2010

Good News...and a recipe too!

Ok, first with the good news....Pat and I are expecting a BABY GIRL due this December 17th!! We are so excited!! This might possibly explain my lack of blogging recently. Hopefully though, now that I am in my second trimester, I will be getting that burst of energy everyone keeps talking about!

Anyways I thought I would post a few baby bump pictures, including a few taken at the Zac Brown Band concert last night. It was a great time, even though it was 95 degrees out...talk about HOT!!!


Ok...on to the recipe. This is a great little sandwich that is easy to put together and great for a quick summer dinner. I did have to adapt the recipe a bit since it called for Brie cheese. Turns out when you are preggo, there is a huge list of foods not to eat, and Brie cheese is one of them. I substituted with Provolone. But, if you are not currently pregnant...I would think the Brie would be delightful!


Parisian Steak and Cheese Croissant Sandwich
adapted by Giada De Laurentiis

Ingredients

4 (4-ounce) beef fillet steaks
Salt and Pepper
2 Tablespoons unsalted butter, room temp
4 croissants
4 slices of Provolone cheese (or 6 ounces Brie, cut into 1/2 inch slices)
2 cups fresh baby spinach
1 cup (about 4 ounces) farred roasted red bell peppers
Stone ground mustard

Directions

1. Season the steaks with salt and pepper. In a medium skillt, melt the butter over medium-high heat. Cook the steaks for about 5 minutes each side for medium-rare. Set aside for 5 minutes before slicing. Slices the steak, across the grain, into 1/4 to 1/2 inch thick slices.
2. Heat a large nonstick skillet or griddle over medium heat. Using a serrated knife, slice the croissants in half, lengthwise. In 2 batches, place the croissant halves, cut side down in the skillet and cook for 30 seconds to 1 minute, until lightly toasted. Lay the cheese slices over the toasted croissant halves.
3. Remove the croissants from the skillet. Place about 1/4 cup of spinach on the bottom halves of the croissants. Add the sliced steak. Arrange the red bell pepper on top of the steak. Top with the remaining spinach. Slather on stone ground mustard to the other half of the croissant and then add it to the top of the sandwich. Serve immediatly.

Last Bite: This is a great sandwich that is full of flavor. Feel free to replace the mustard with a different condiment...I just happen to really like the punch of flavor it adds!

Tuesday, June 22, 2010

Afternoon Delight


It's hot out! And sticky...and muggy. But I sort of love it! I dream of summer all winter long so I make myself appreciate all of it....even the really, really, REALLY hot days!

This summer, while in search of something filling yet refreshing to snack on, I came across this awesome dish. White bean dip with pita chips....super yum! It comes together in a flash and gives you plenty of time to chat with friends, drink a glass of wine, or catch up on the lastest episode of "The Bachelorette".

But, before I share the recipe with you...I want to share with you the newest addition to our family! Meet Roxy!! She is our new silver lab puppy and we just love her to pieces. The eery thing is that she reminds us an awful lot of our sweet Hershey. We just know she is still looking after us!

Roxy loves to play and loves to nap and is just about the cutest puppy ever! She has brought so much laughter and light back into our lives!


Alright....on to the recipe....that I promise you will love!!


White Bean Dip with Pita Chips
from Giada De Laurentiis


Ingredients
1 15 ounce can cannellini beans, drained and rinsed
2 cloves of garlic
2 tablespoons fresh lemon juice
1/3 cup olive oil, plus 4 tablespoons
1/4 cup, loosely packed, fresh flat parsley leaves
Salt and Pepper
6 pitas
1 teaspoon dried oregano


Directions
1. Preheat oven to 400 degrees.
2. Place beans, garlic, lemon juice, 1/3 cup olive oil, and parsley into a food processor. Pulse until mixture is coarsely chopped. Season with salt and pepper.
3. Transfer puree to a small serving bowl.
4. Cut each pita into 8 wedges. Arrange wedges on a large baking sheet and pour remaining oil over them. Toss and spread out evenly. Sprinkle with oregano, salt and pepper.
5. Bake for 8 to 12 minutes, or until toasted and golden.


Last Bite: The lemon and fresh parsley really make this dip come alive. Take it to a party or just make it as a side for dinner one night. Either way, you won't be disappointed!